Accountant guide
Accountant is the daily Accounting Workspace role. It should be simpler than the professional verifier workspace and should focus on where work starts: document upload, intake, document lists, exceptions, approvals, and ERP readiness.
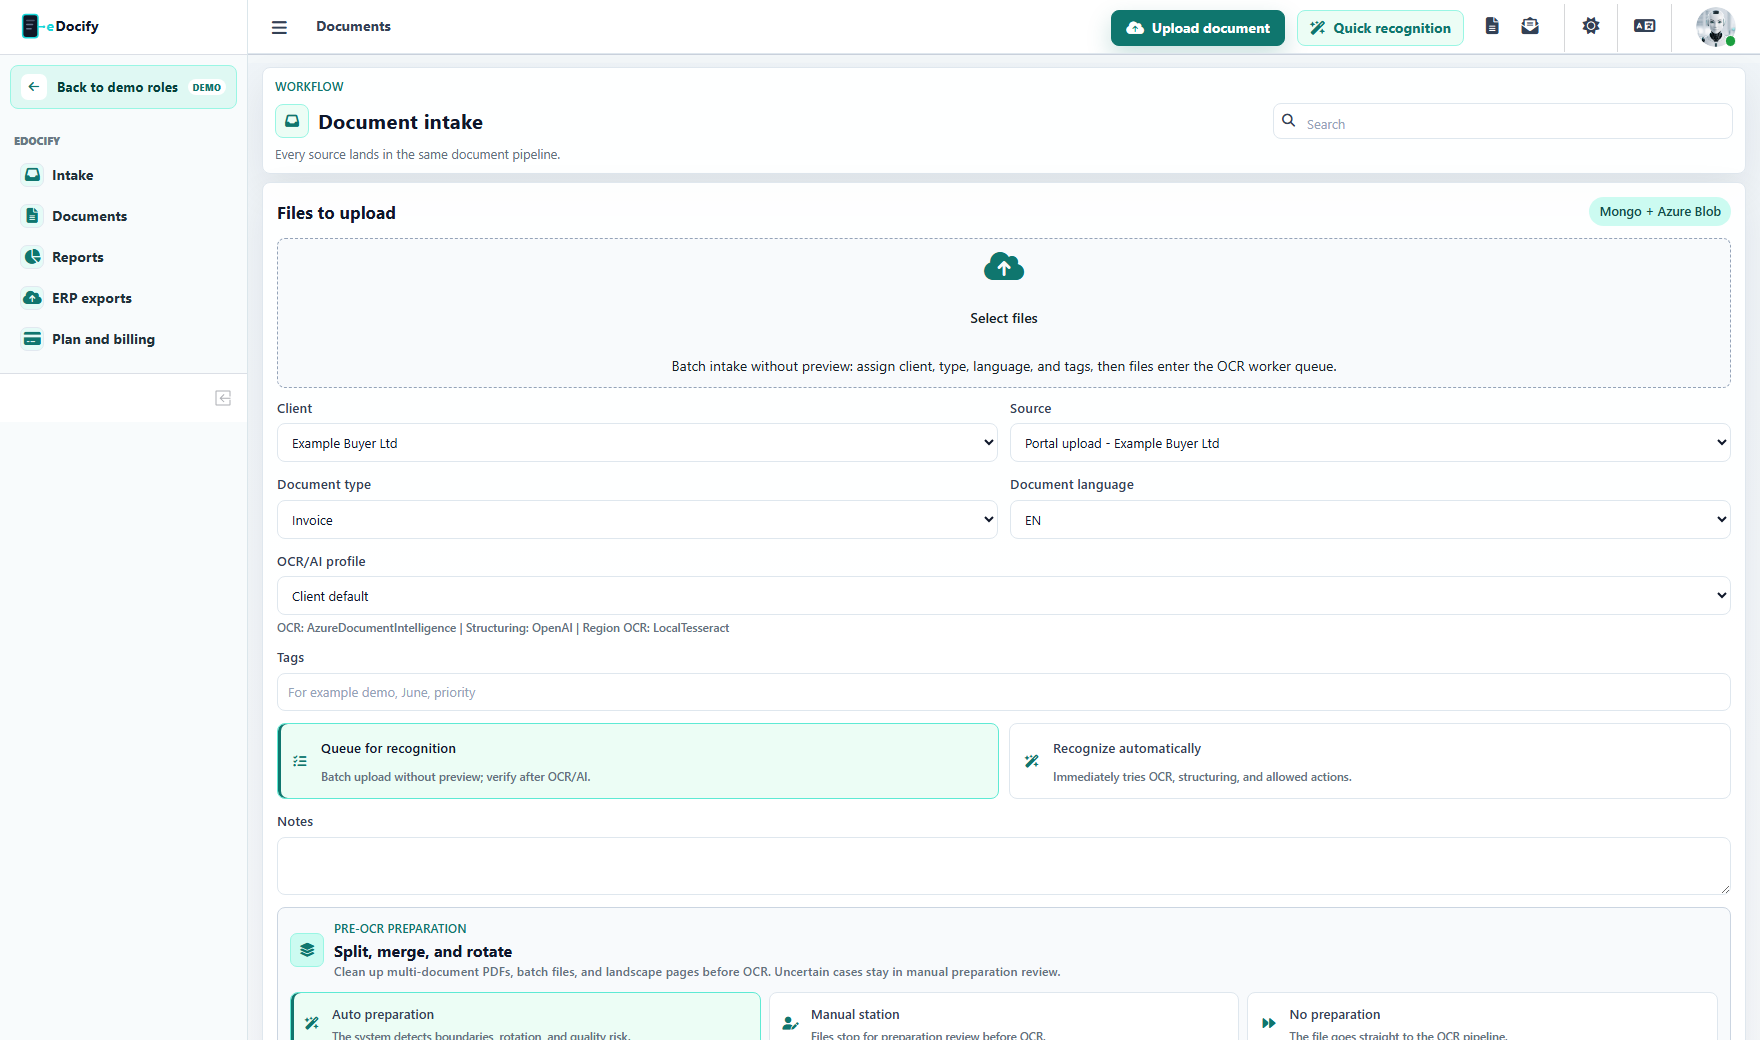
Visible menu
In the accounting demo screenshot audit, Accountant sees:
- Intake;
- Documents;
- Reports;
- ERP exports;
- Plan and billing;
- Upload document;
- Quick recognition.
Main workflow
- Upload one or many documents.
- Add client, document type, tags, OCR/AI profile, and batch metadata.
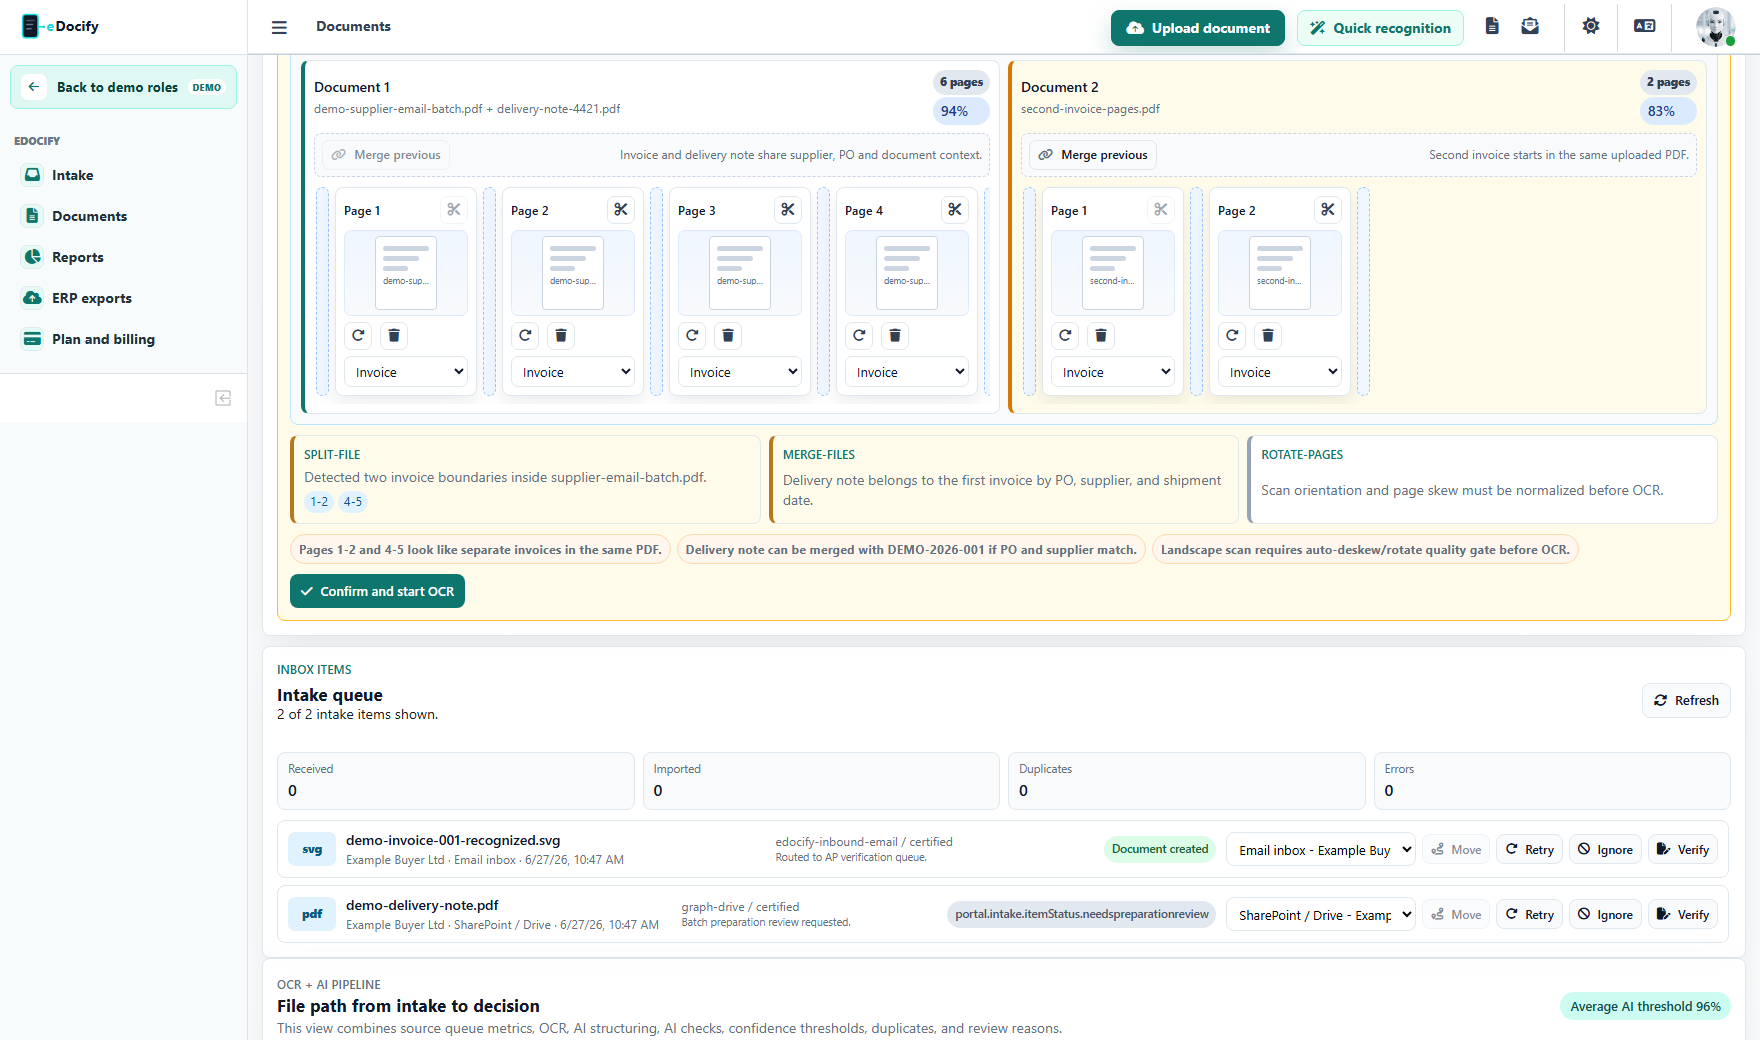
- Confirm split/merge/rotate preparation when needed.
- Let OCR/AI process the documents.
- Review the document list.
- Send uncertain documents to verification.
- Check approvals and export readiness.
- Run or monitor ERP export when allowed.
Batch intake
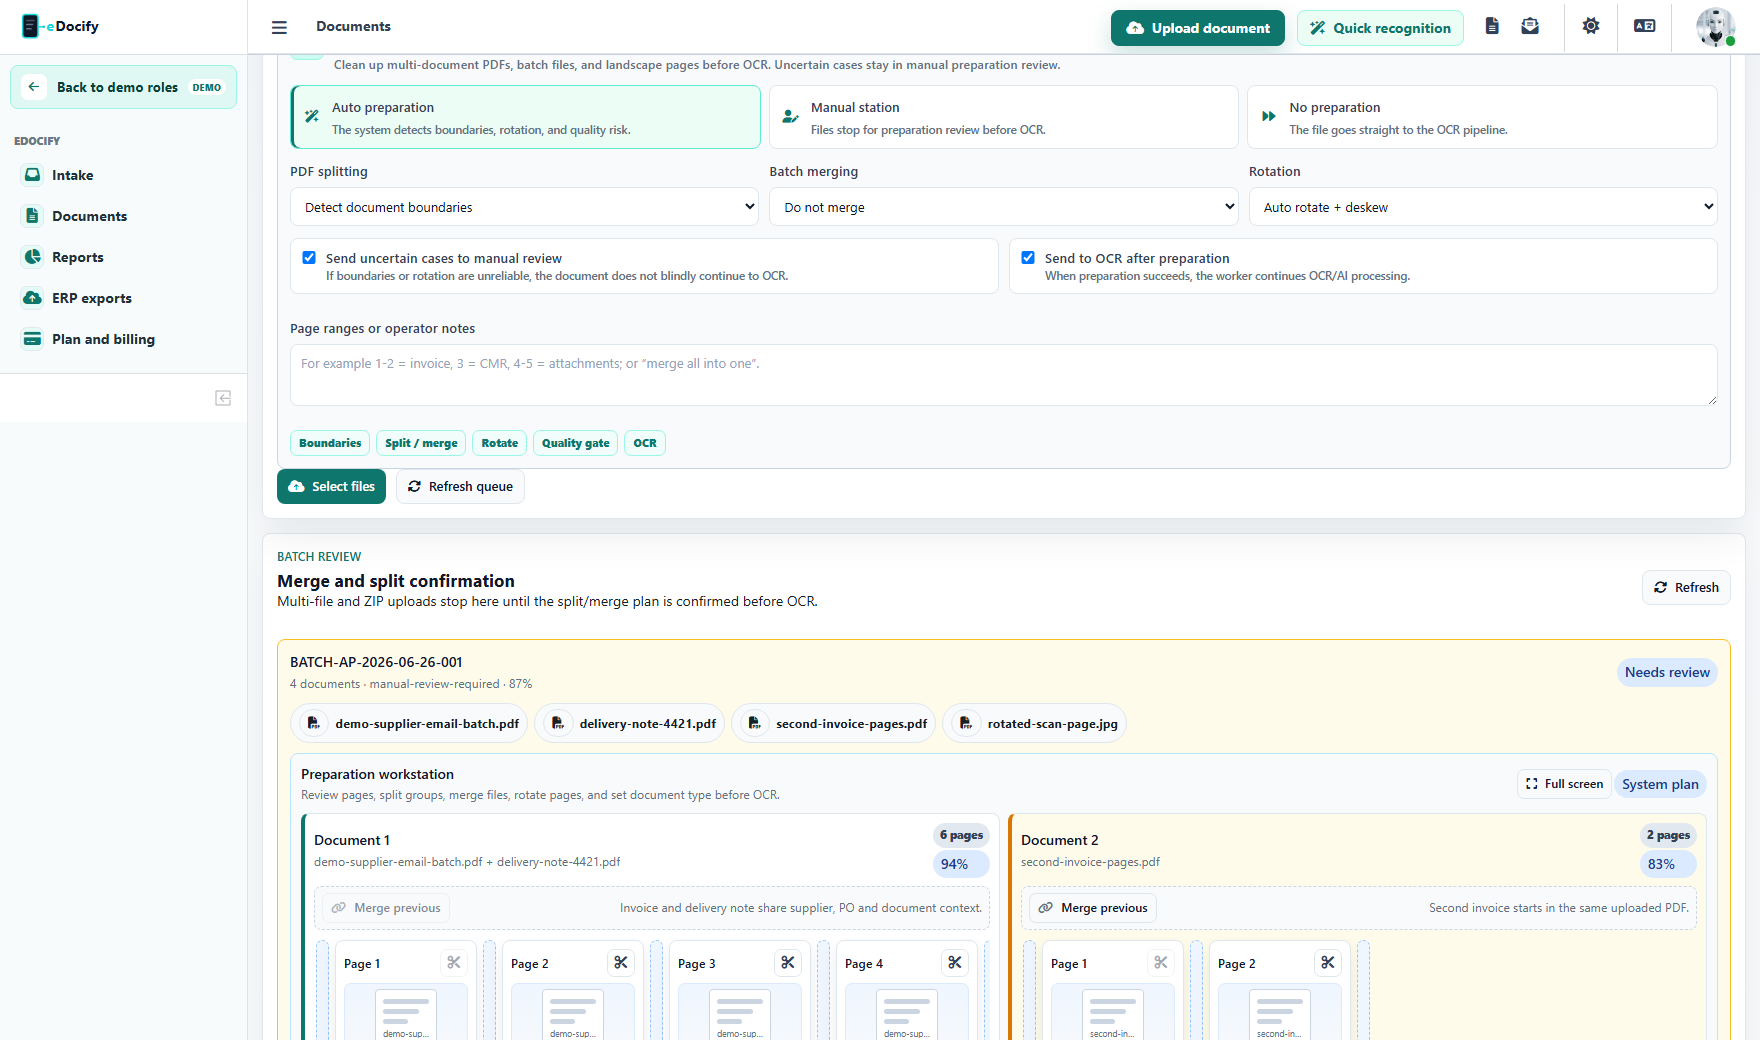
Accountant can upload:
- one PDF;
- many PDFs;
- images;
- ZIP packages;
- email attachments routed through configured inboxes;
- Drive or SharePoint files through connectors.
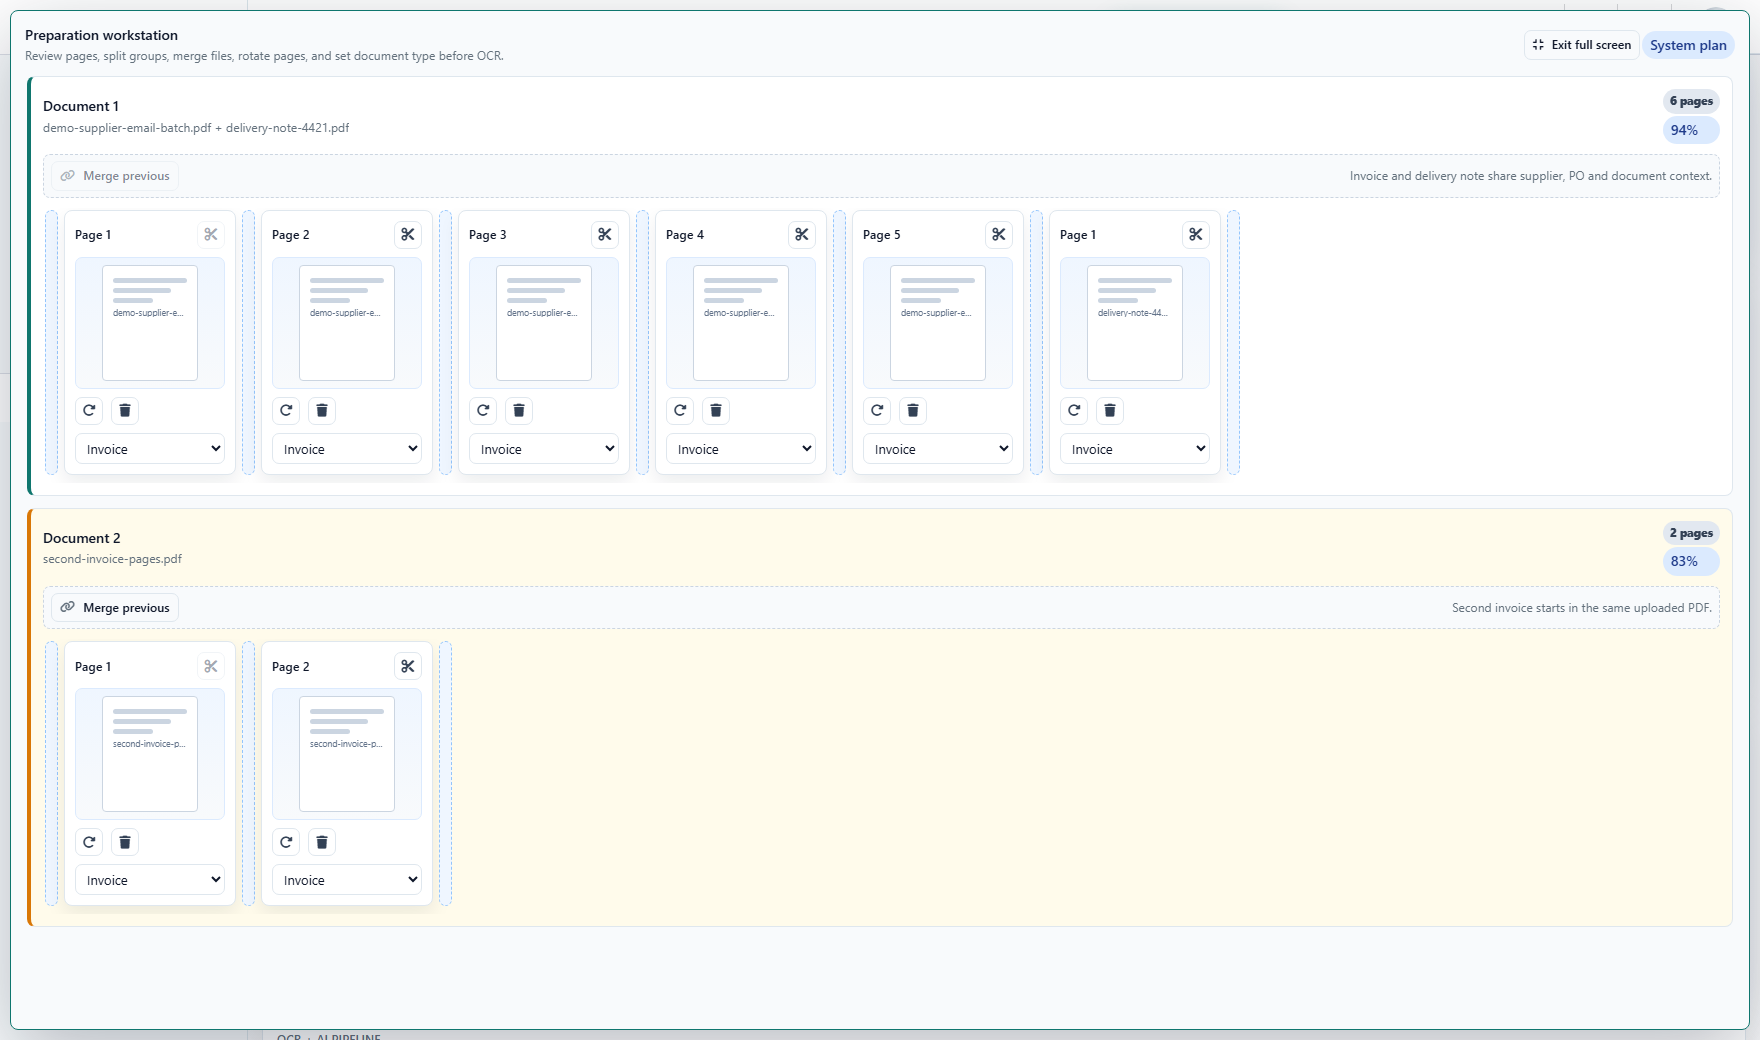
When eDocify is not sure whether documents should be split or merged, the accountant opens the preparation workbench.
Full-screen mode is used when the batch has many pages.
Document list
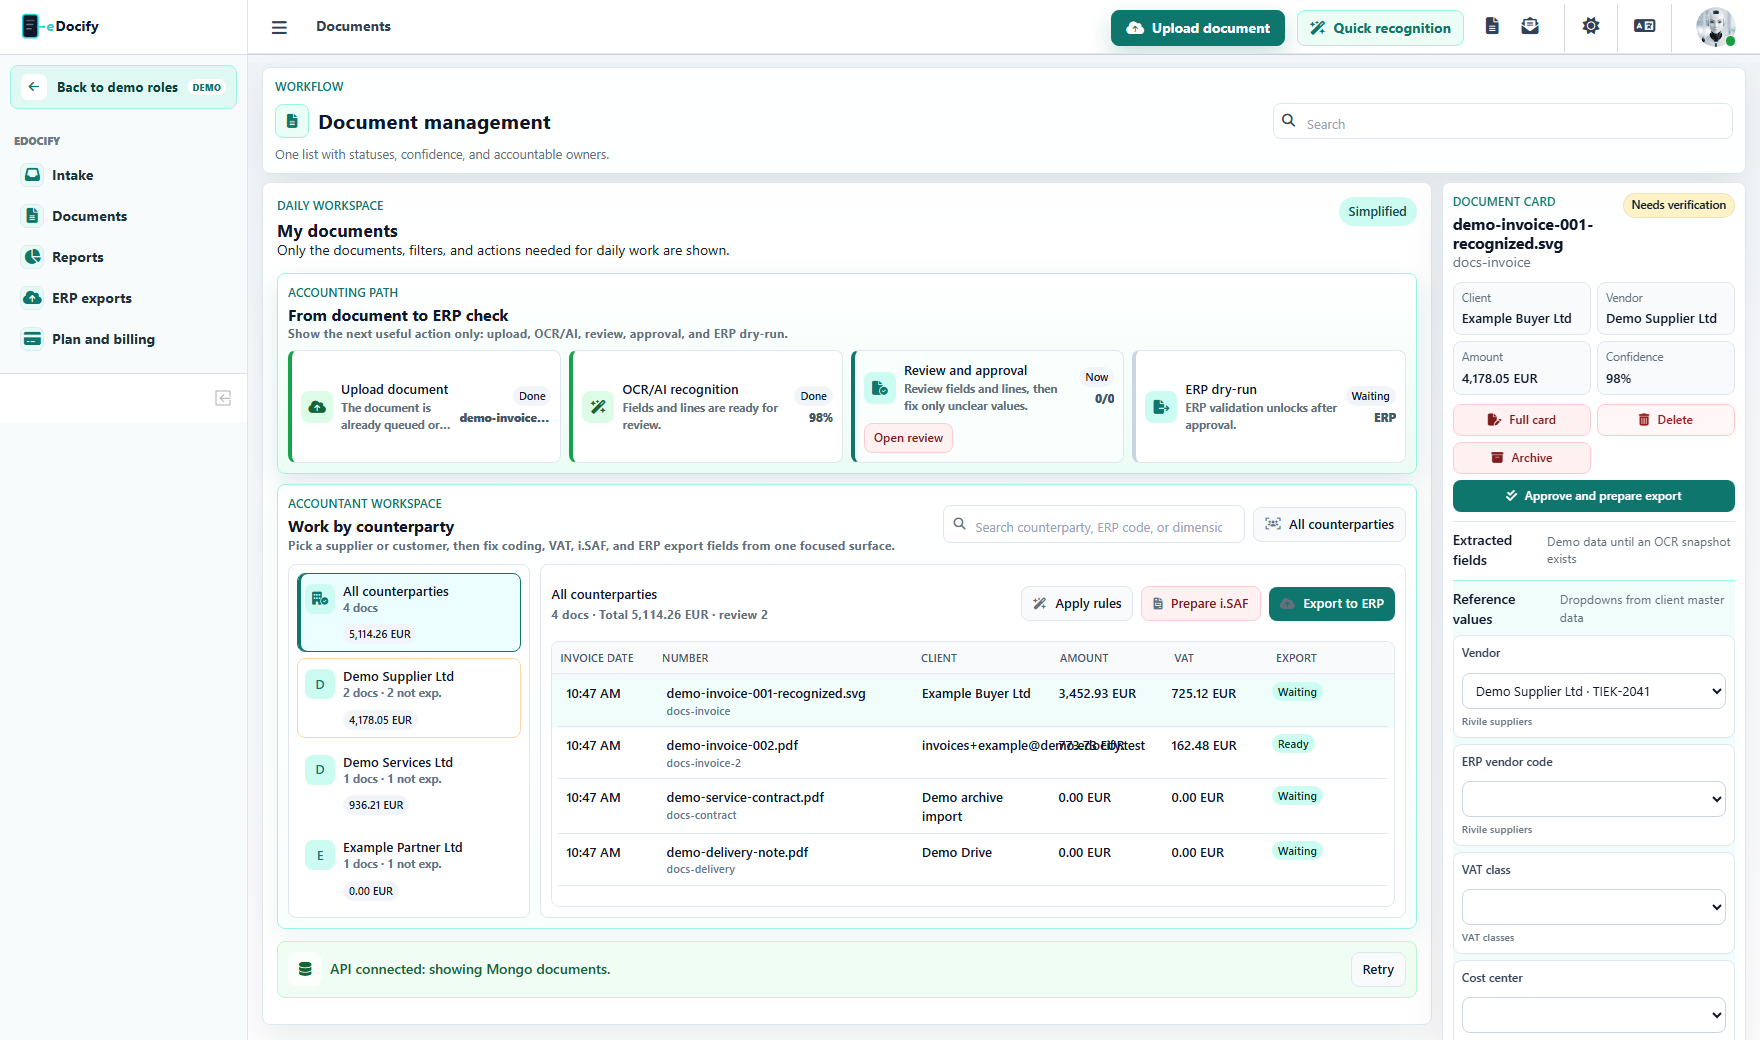
The accountant list shows:
- status;
- source;
- client;
- vendor;
- amount;
- confidence;
- owner;
- received time;
- saved views;
- filters;
- bulk actions.
Useful views:
| View | Purpose |
|---|---|
| All | Full active document list. |
| Approvals | Documents waiting for human approval. |
| ERP ready | Documents ready for export. |
| Exceptions | Documents with OCR, duplicate, or export risk. |
| Integrations | Connector and ERP route related documents. |
| Duplicates | Documents flagged by duplicate detection. |
What accountant should not see
- global system administration;
- AI Learning;
- provider release gates;
- unrelated product profiles;
- archive-only retention controls.
Demo test path
- Enter Accounting Workspace as Accountant.
- Open Intake and upload a batch.
- Open preparation workbench and test split, merge, rotate, and full-screen.
- Open Documents and verify filters, saved views, and bulk action buttons.
- Confirm the UI does not look like the full verifier factory unless Quick recognition is opened.