Client admin guide
Client admin manages configuration for a specific company or client. This role is narrower than tenant admin and should be comfortable for a customer power user who owns document fields, lists, and approval rules.
What client admin can do
| Area | Actions |
|---|---|
| Document fields | Add, remove, require, hide, reorder, and bind fields to lists or ERP mappings. |
| Lists | Manage company-level values such as departments, projects, suppliers, and cost centers. |
| Approval rules | Configure thresholds, approvers, substitutions, and line-level routing. |
| OCR/AI profile | Select the allowed default profile for the client or document type. |
| ERP profile | Select the allowed export mapping profile. |
| Reports | Review company-level operational status. |
Document card configuration
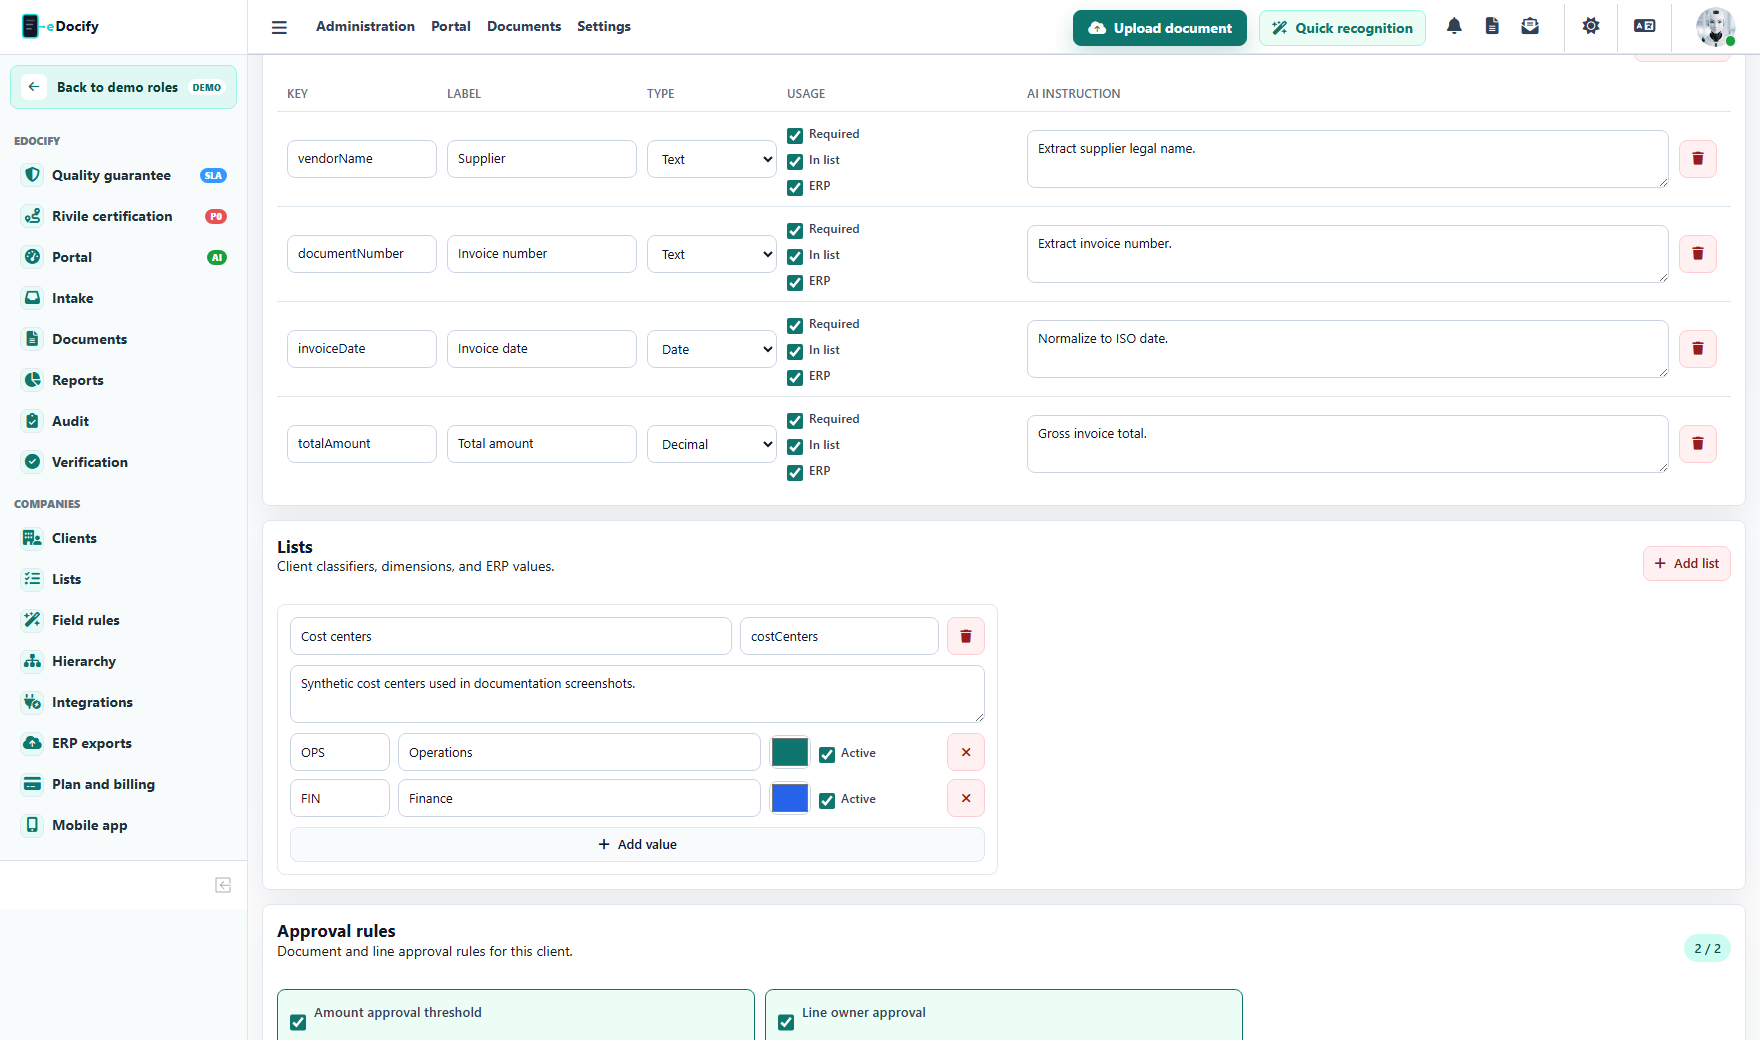
Client admin controls what the verifier or accountant sees in the document card:
- visible fields;
- required fields;
- lookup fields;
- ERP mapping keys;
- line-level approval support;
- list bindings;
- validation hints.
Reference list workflow
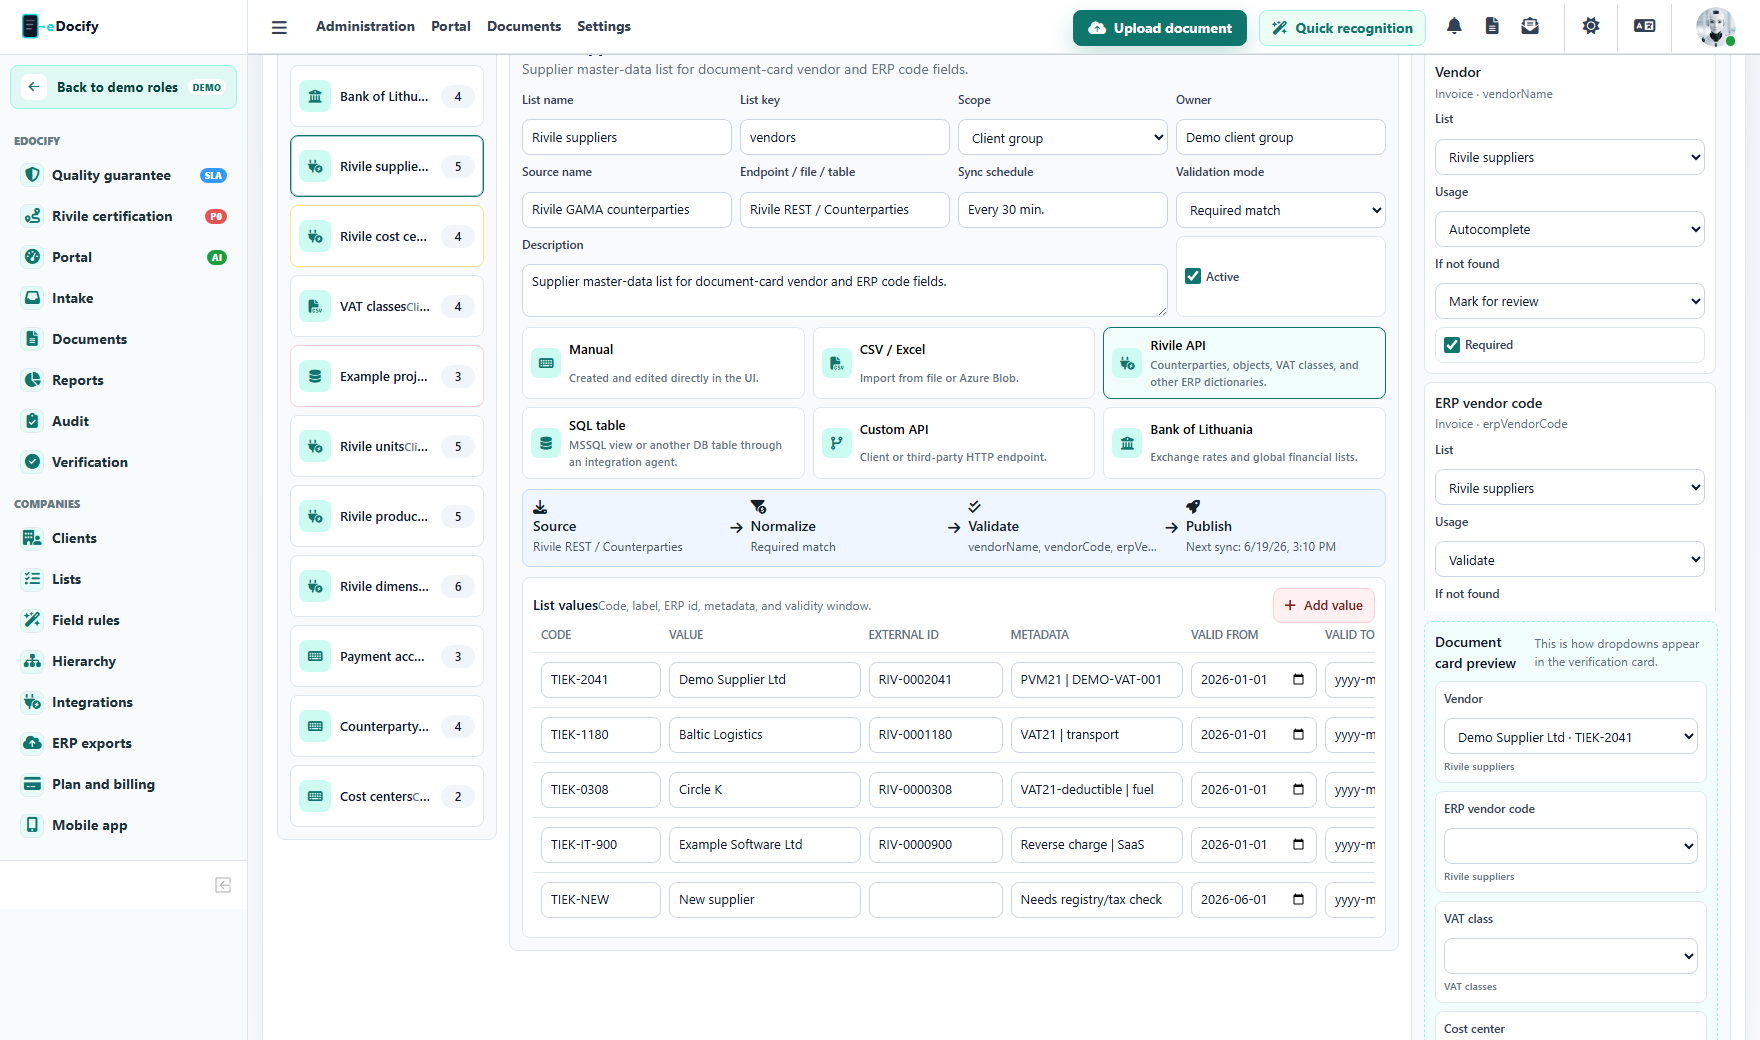
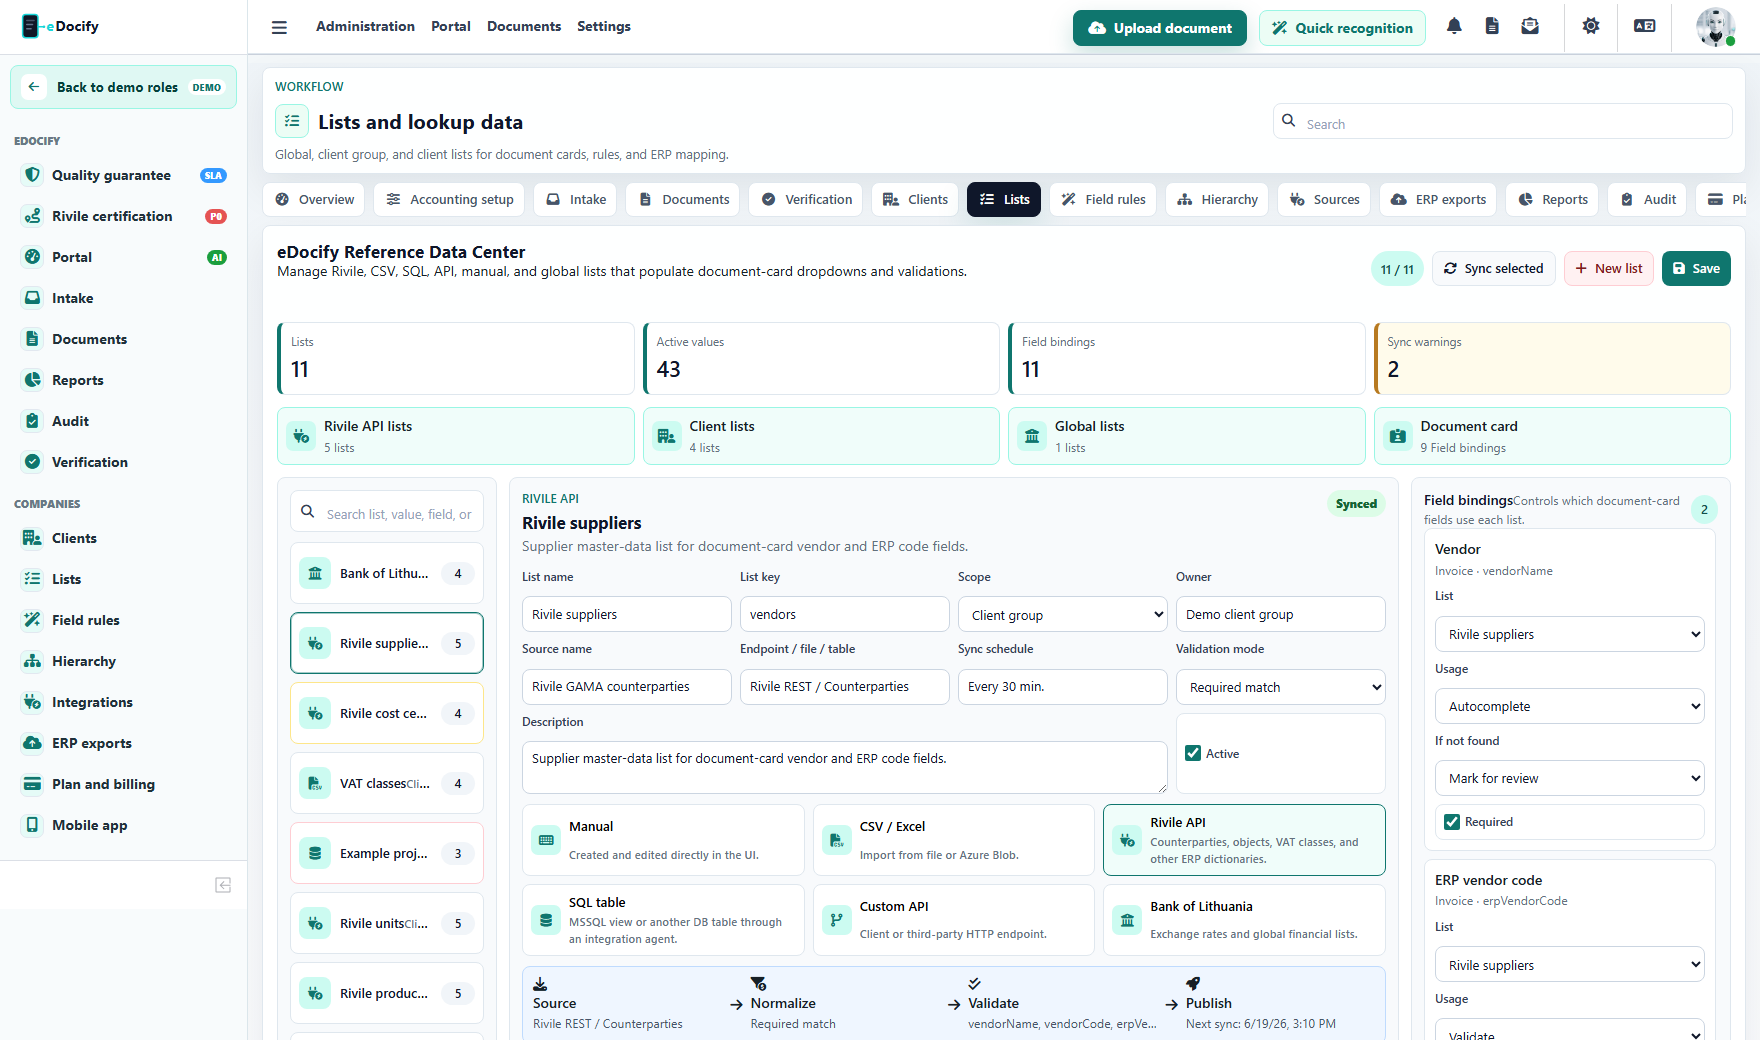
- Create or select a list.
- Choose source: manual, CSV, Rivile API, SQL table, custom API, or Bank of Lithuania.
- Define key, label, and extra columns.
- Sync or edit items.
- Bind the list to a document field.
- Test the list in verification UI.
Approval workflow
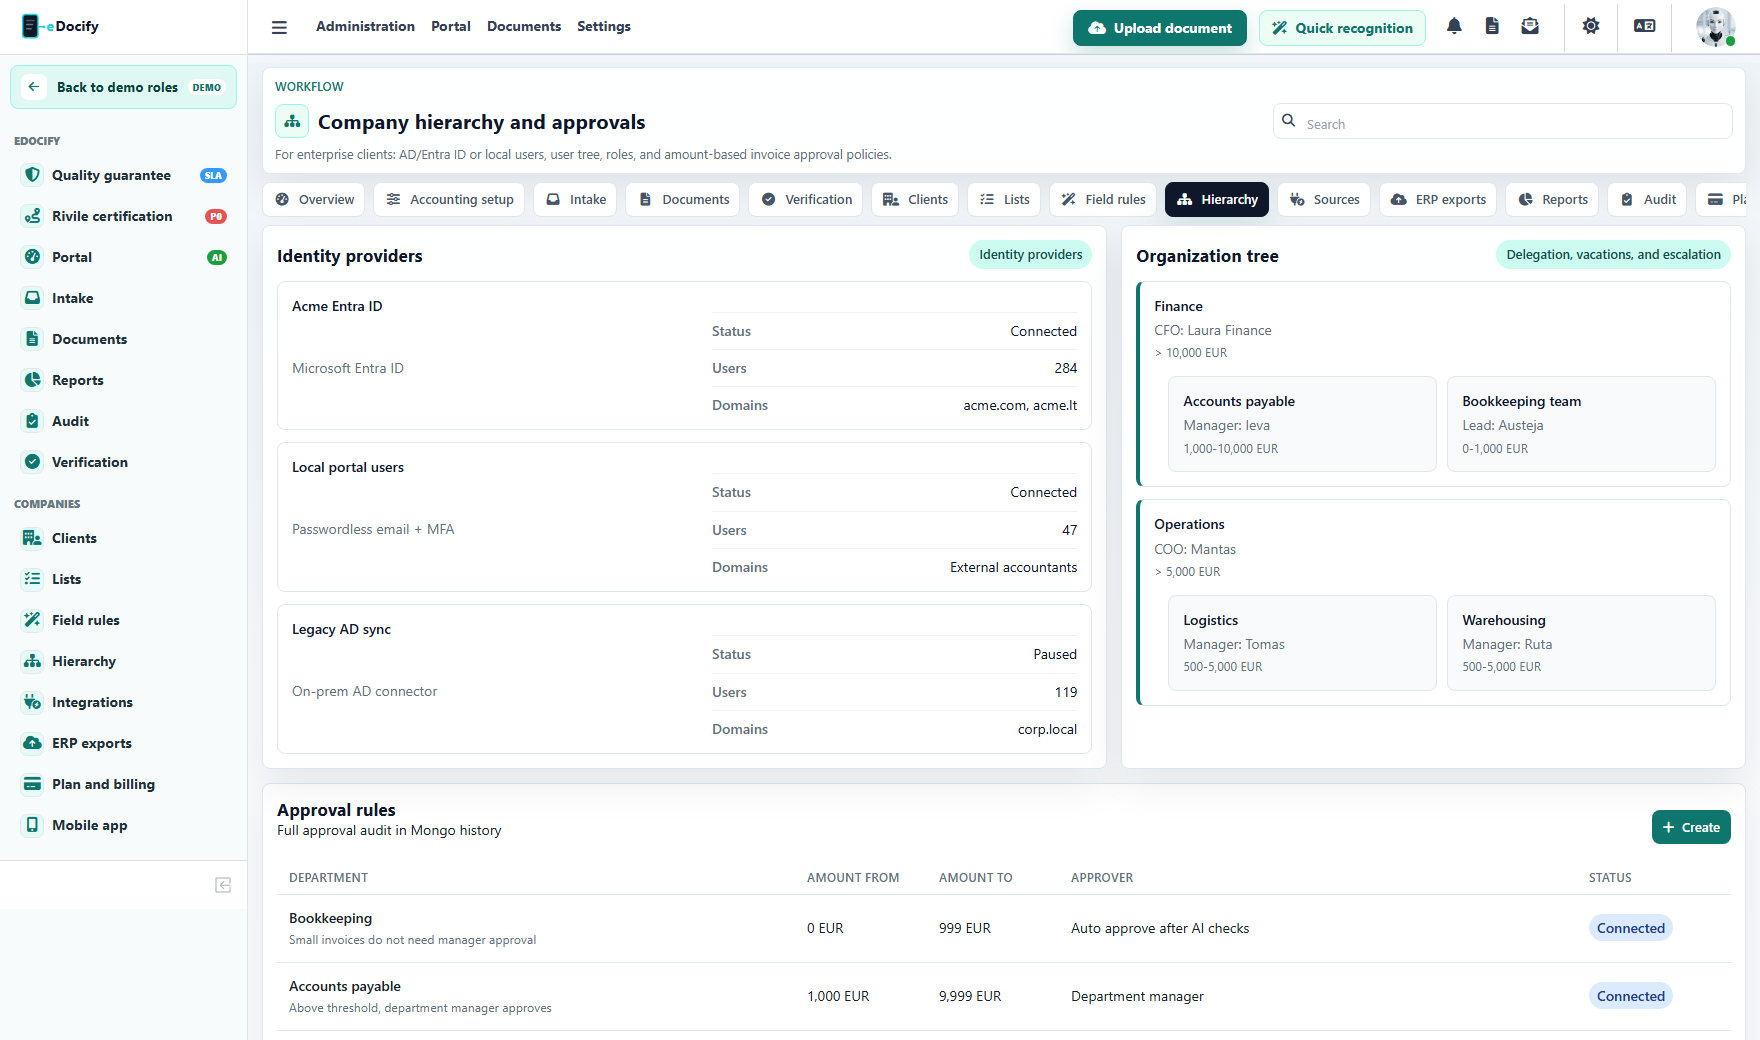
Client admin should be able to model practical cases:
- invoices above an amount require manager approval;
- specific vendors require finance director approval;
- specific line types route to department owners;
- substitutes handle vacation or absence;
- duplicate or bank account risk requires extra review.
What this role must not see
- global platform settings;
- other client companies;
- unrelated product sandboxes;
- internal AI Learning;
- production secret values;
- break-glass system admin tools.
Demo test path
- Open Clients.
- Select a client profile.
- Add a field and bind it to a list.
- Save the profile.
- Open Verification and confirm the field appears only where allowed.