First product import
This guide walks through a complete NopBridge product import: source, typed schema, mapping, dry run, and real import.
Use a small sample first. A good first test is a CSV, XLSX, JSON, or XML file with 5 to 20 products and a few realistic fields such as SKU, name, price, category, attributes, image URL, and stock quantity.
Step 1: Open NopBridge
- Sign in to nopCommerce admin.
- Open Bitlogika in the left menu.
- Open NopBridge.
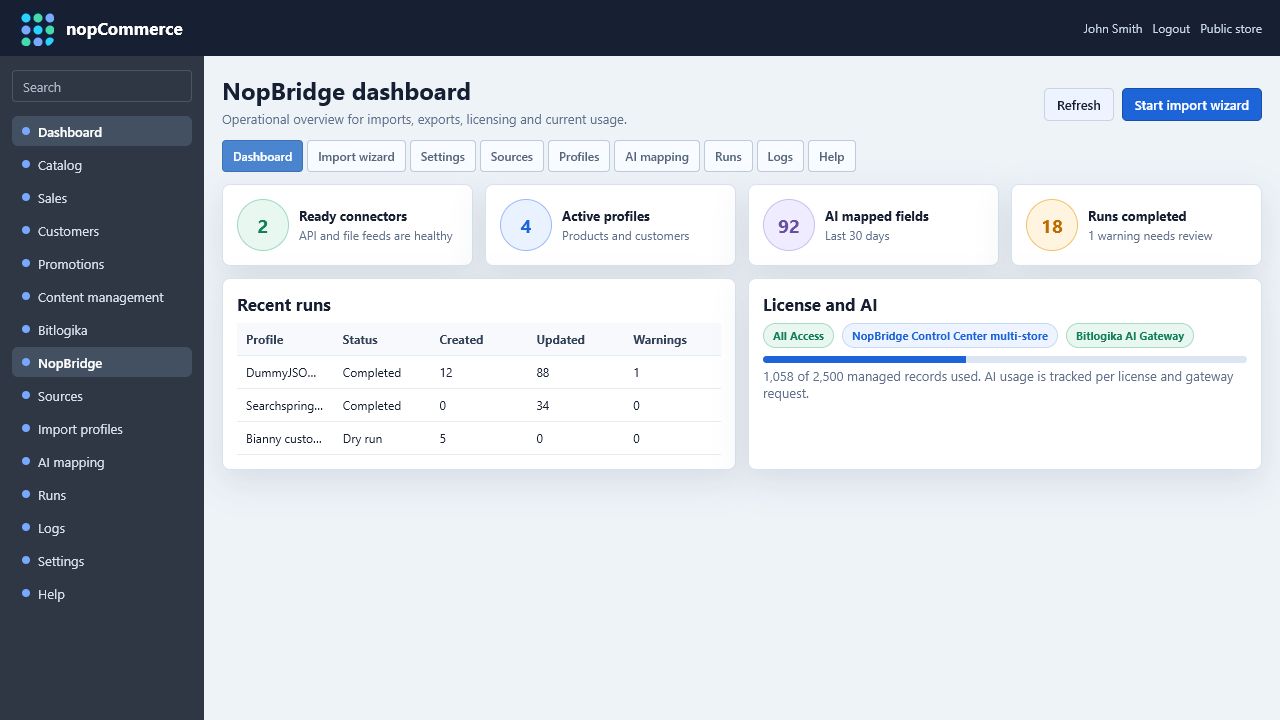
- Start with the dashboard to confirm the license, usage, and last run status.
Step 2: Create a source
- Open Sources.
- Select the source type.
- Enter the required connection settings.
- Save the source.
- Use the test action when available before you continue.
You can do this directly in Sources or through the first step of the Import wizard.

Supported source patterns:
| Source type | Typical use |
|---|---|
| File / UNC | Local files, shared folders, CSV, XLSX, XML, JSON |
| API | HTTP or HTTPS endpoints with headers and tokens |
| FTP / SFTP | Partner feeds and scheduled supplier exports |
| Drive / SharePoint | Cloud-hosted business files |
| S3 / Blob | Object storage feeds and generated exports |
| Database | Direct SQL-based source reads where configured |
Step 3: Review the typed source schema
NopBridge stores a typed schema for the source. This is where the imported fields become understandable before mapping starts.
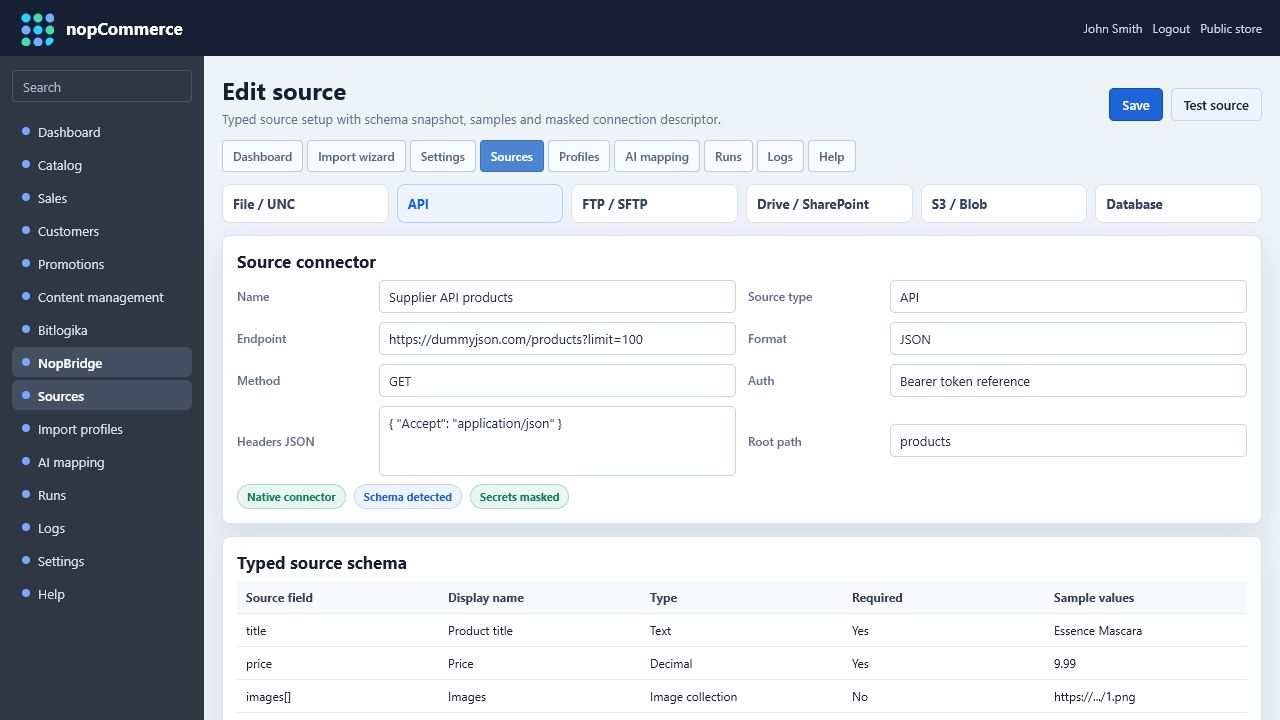
Check:
- Source field is the technical field name from the feed.
- Display name is a readable label for administrators.
- Type matches the expected data: text, number, date, boolean, URL, image, collection, or object.
- Required is enabled only for fields that must exist for a valid import.
- Sample values help AI mapping and manual review.
For JSON and XML sources, nested fields can be flattened into paths such as category.name, images[0], or attributes.color. For XLSX and CSV, fields normally come from headers.
Step 4: Create a product mapping
- Open AI mapping or Profiles depending on your workflow.
- Choose the source.
- Choose Products as the import entity.
- Generate mapping suggestions with AI when available.
- Review every target field before saving.
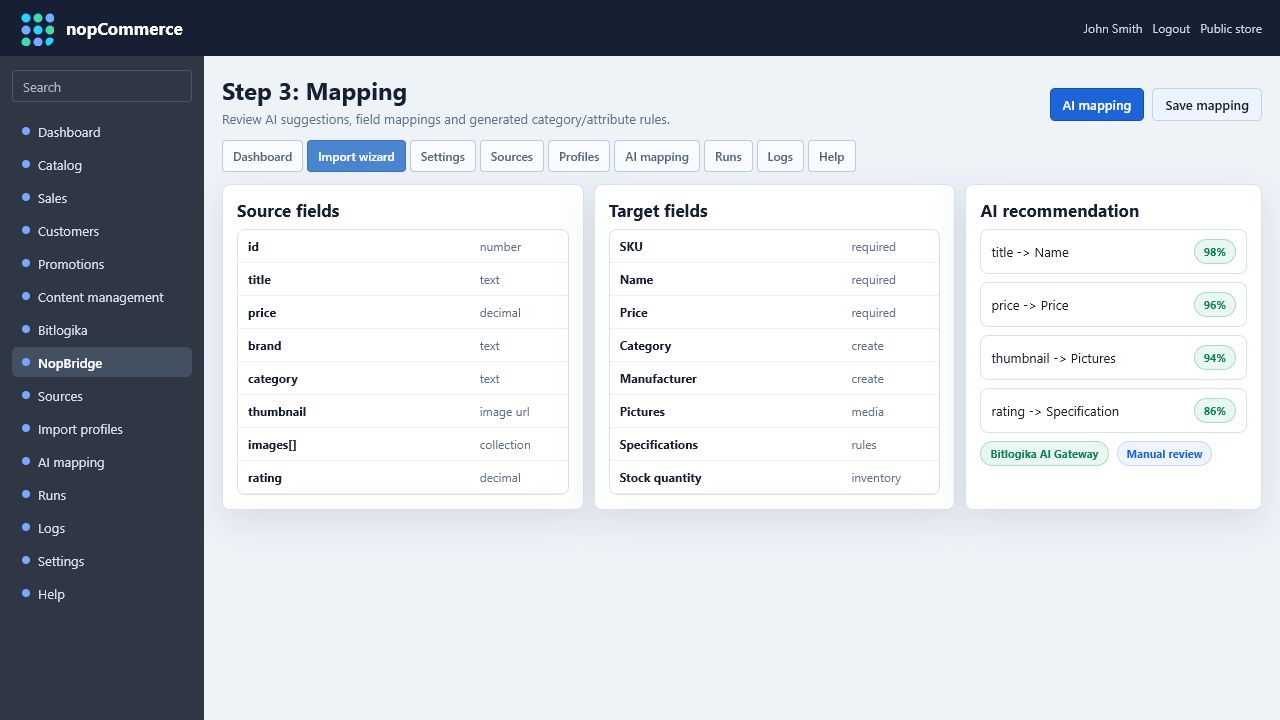
Minimum recommended product mapping:
| nopCommerce target | Recommended source |
|---|---|
| SKU | External SKU, item number, barcode, or unique product ID |
| Name | Product title |
| Short description | Short marketing text or compact product summary |
| Full description | Long description, HTML description, or generated combined description |
| Price | Numeric sale price |
| Stock quantity | Available quantity or inventory |
| Category | Main category, breadcrumb, or department |
| Manufacturer | Brand or vendor |
| Pictures | Image URL, local file path, FTP path, or Drive file reference |
| Product attributes | Variant fields such as color, size, material |
| Specification attributes | Technical facts such as weight, warranty, rating |
Step 5: Add rules where needed
Rules make imports reliable when supplier data is inconsistent.
Common rules:
- Trim whitespace from text.
- Convert decimal separators.
- Normalize category names.
- Split tag or attribute lists.
- Map supplier stock status to numeric quantity.
- Build image paths from a base folder plus file name.
- Skip records that do not have SKU or name.
- Use defaults for missing values.
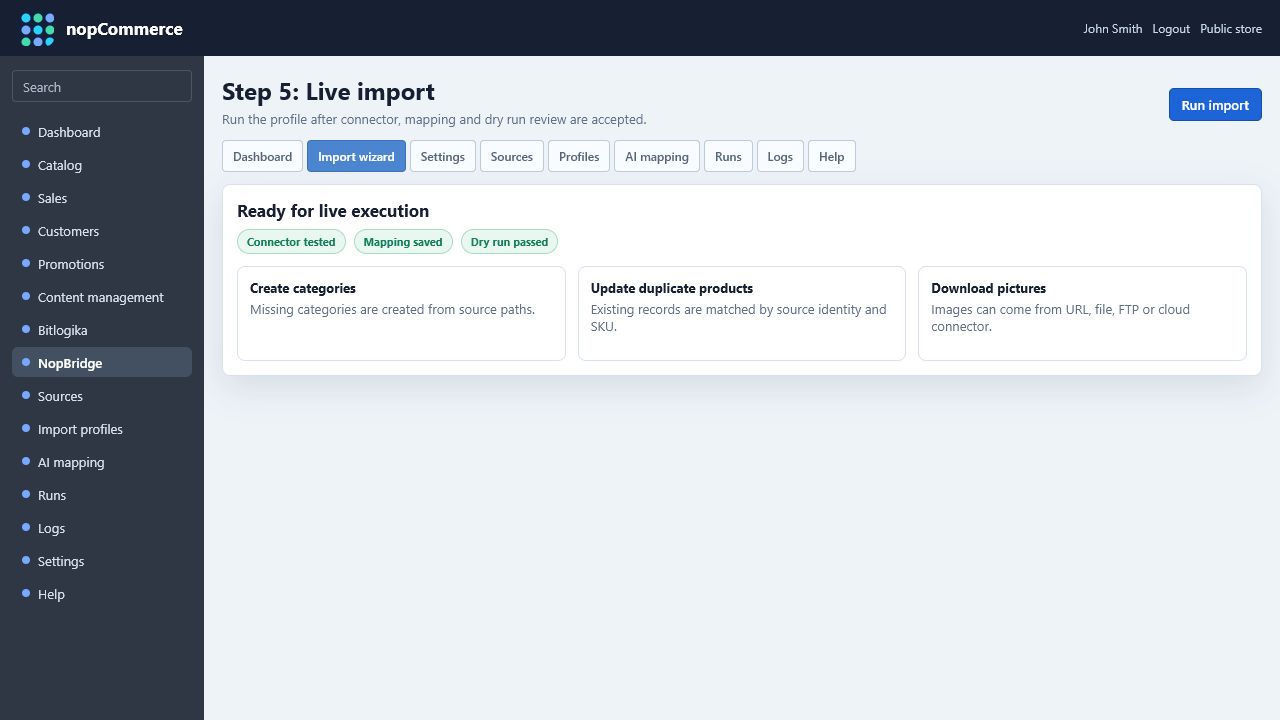
Step 6: Run a dry run
Dry run validates the import without changing the catalog.
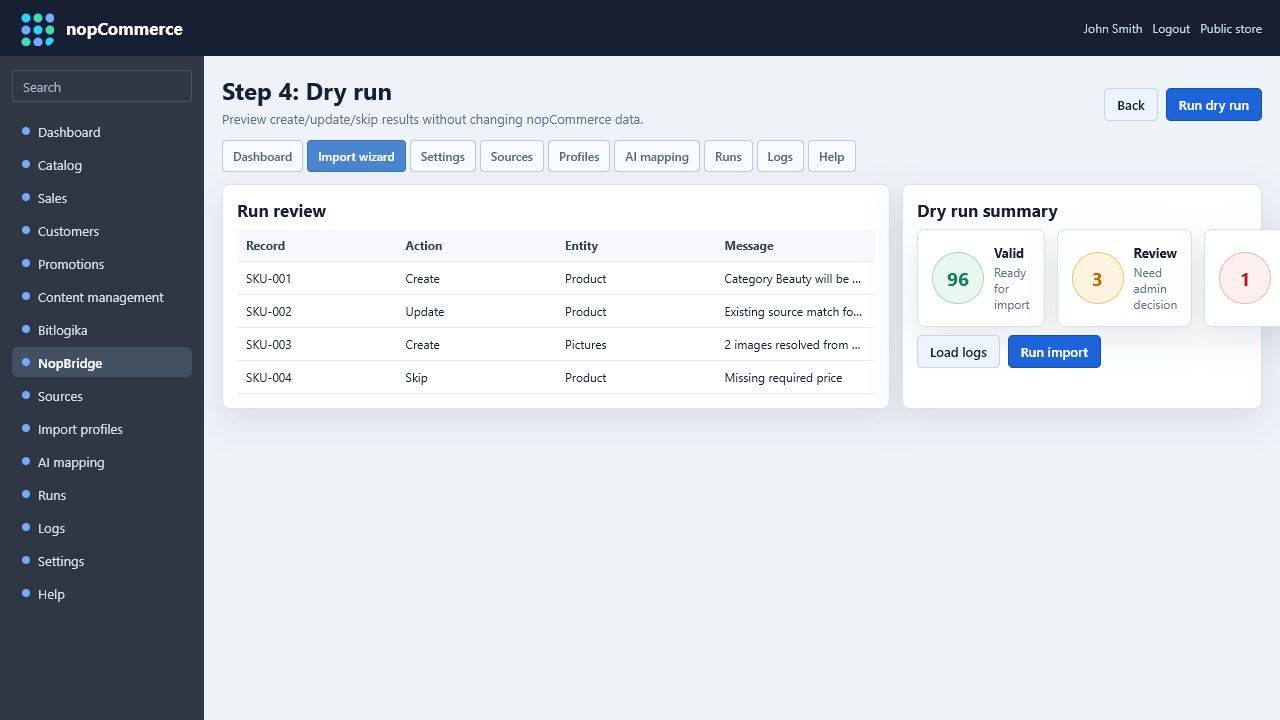
Check:
- How many records will be created.
- How many records will be updated.
- Which records will be skipped.
- Whether categories, attributes, specification attributes, and pictures resolve correctly.
- Whether duplicate detection matched existing products by the selected source identity.
If the dry run does not look right, fix the mapping before running the real import.
Step 7: Run the real import
- Open Runs.
- Select the profile.
- Start the import.
- Watch the run status.
- Open imported products in nopCommerce catalog and check the result.
After the run, validate:
- Product count.
- Product names and SKUs.
- Categories.
- Product attributes.
- Specification attributes.
- Images.
- Duplicate update behavior on a second run.
Step 8: Repeat the import to test updates
Run the same profile again after changing a few source values. NopBridge should detect existing imported records and update them instead of creating duplicates.
Good repeat-test changes:
- Change price.
- Change stock.
- Add one new image.
- Add one new specification attribute.
- Rename a category.
- Add one new product.
The second run should show updated and created counts separately.