NopBridge licenses
NopBridge uses Bitlogika licensing to activate product features and plan limits.
What you need
- License key or customer access details
- Access to the nopCommerce admin area
- Internet access from the server when online activation is used
Step-by-step activation
- Open the NopBridge configuration area.
- Enter the license key.
- Save the settings.
- Run license validation.
- Confirm that the expected plan and limits are displayed.
Plans
| Plan | Typical use |
|---|---|
| Free | Trial, demo, and small proof of concept with limited record count |
| Products Import | Product import workflows |
| Products Suite | Product import, export, scheduling, and broader product operations |
| All Access | All released modules, AI mapping, NopBridge Control Center, and enterprise limits |
What the license controls
The license can control:
- Enabled modules.
- Entity access, such as products or customers.
- Import and export features.
- Record limits.
- Store activations.
- NopBridge Control Center access.
- AI gateway usage.
- Expiration and renewal state.
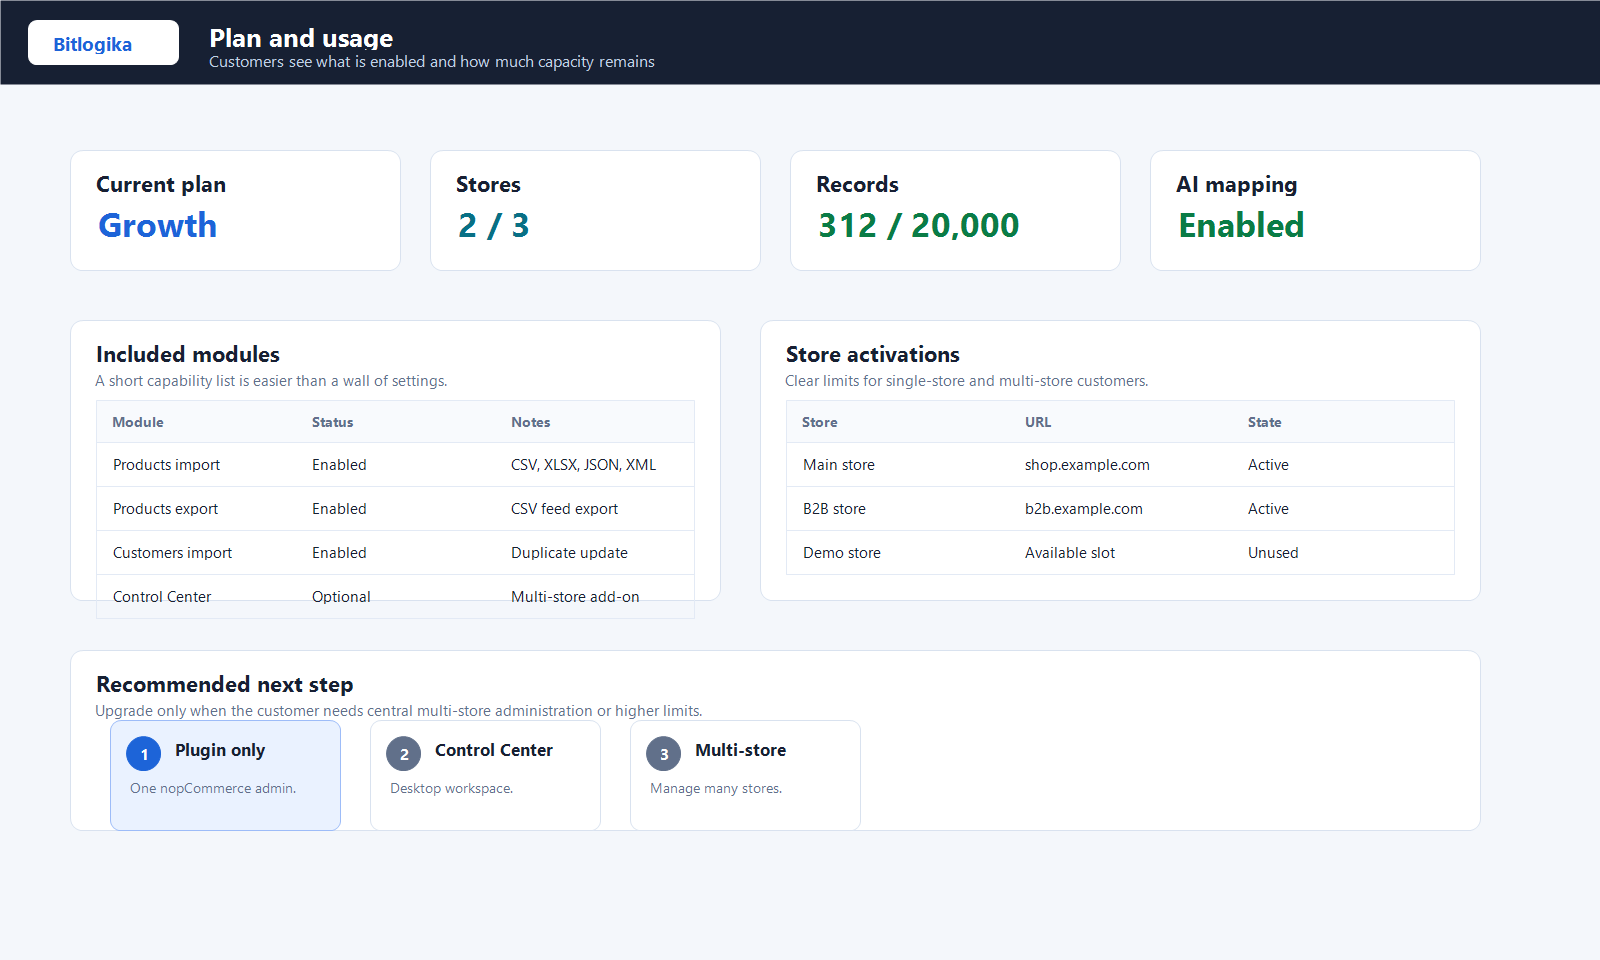
Usage limit check
The dashboard should show the current plan and remaining usage where limits apply. If the limit is reached, NopBridge should stop the protected operation and log a clear warning.
If activation fails
Check that the key is entered correctly, the server can reach the Bitlogika API, and the license is assigned to the correct product.
Send support:
- Product name.
- Store URL.
- License key suffix only, never the full key.
- Error message.
- Screenshot of the license page.